________________________________________________________________________________
John Deere 5300, 5400, 5500 Engine and Drivetrain
JD 5300, 5400, 5500
Engine
Starting the Engine
- Set selective control valve levers to neutral position.
- Move hand throttle lever to a medium speed setting (first third of
lever travel).
- Move reverse drive lever to neutral.
- The engine will not start if PTO clutch lever is in engaged position.
- Turn key in main switch clockwise to end position. Release key as soon
as engine starts.
Coolant Temperature Gauge - The needle on the temperature gauge rises as
engine warms up. If needle reaches red zone, stop engine and determine
the cause.
Check coolant level in coolant expansion tank and radiator when engine
cools. Also check grille, radiator and radiator screen for plugging.
Check fan belt tension.
Warming Up the Engine - Do not place tractor under full load until
engine is properly warmed up. Run engine at about 1500 rpm for several
minutes. Run engine at
about 1900 rpm and under light load until engine reaches normal
operating temperature.
Observe Engine Work and Idle Speeds
Slow idle speed should be 750 to 800 rpm (JD 5300, 5400 tractors) or 800
to 850 rpm (JD 5500 tractors). At light or no load, full throttle speed
will increase to 2600
rpm. Normal operating speed is 1400 to 2400 rpm (JD 5300 tractors), 1600
to 2400 rpm (JD 5400 tractors) and 1500 to 2400 rpm (JD 5500 tractors).
Within these
limits engine can be put under full load.
Tachometer shows engine rpm, read in hundreds. On the 40 km/h (25 mph)
version, the tachometer also shows the approximate value of the
tractor's four ground
speeds (fast range; road travel) in relation to the engine revolutions.
For standard 540 rpm PTO speed, increase engine speed until tachometer
needle is aligned with 2100 rpm mark. For 540E PTO operation, increase
engine speed
until tachometer needle is aligned with 1500 rpm mark. Hour meter shows
hours of operation in full hours and tenths.
Cold Weather Starting Procedure Using Intake Air Heater System
- The John Deere 5300, 5400, 5500 tractors are equipped with an intake
air heater system. An electric heating element warms up the intake air.
- Activate the intake air heater system by pushing in the main switch
with the key.
- Hold the key in for 10 to 15 seconds with temperatures down to -18C
(0F), for 30 seconds with temperatures down to -23C (-10F) and up to 45
seconds with
temperatures below -23C (-10F).
- Turn main switch clockwise and start engine.
- If engine runs rough, activate the intake air heater system by
pressing in the main switch until engine runs smoothly.
Check Engine Oil Level
- Park tractor on level ground and pull out dipstick. Oil level should
be between two marks on dipstick.
- Dont operate engine when oil level is below low mark on dipstick.
- If level is low, add oil through oil filler hole until even with upper
mark. Dont over fill.
- Use seasonal viscosity grade oil.
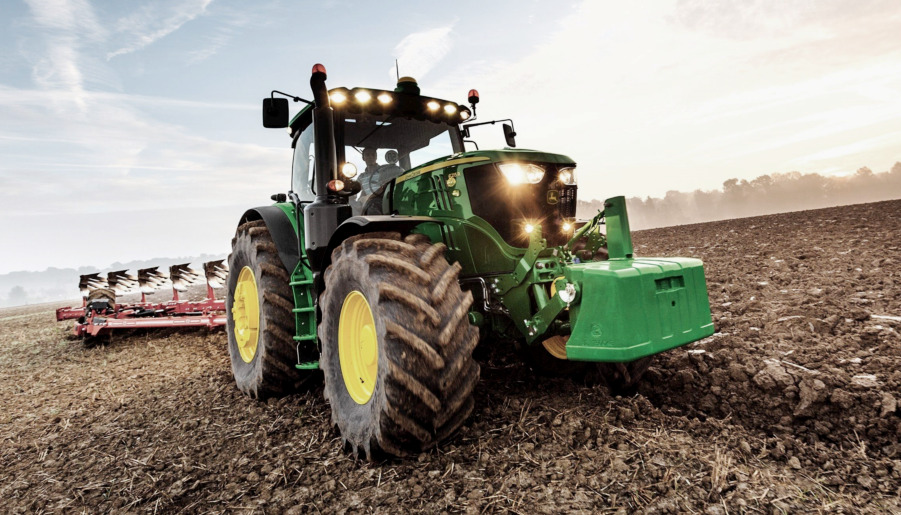
Change Engine Oil and Filter
Change oil and filter a minimum of once a year.
- Run engine to heat oil. Stop engine. Remove oil drain plug and drain
oil.
- Replace engine oil filter while changing oil.
- Apply a film of oil on the new oil filter gasket and install new
filter. Hand tighten plus 1 / 2 turn. Install drain plug.
- Add seasonal viscosity grade oil. (JD 5300 Engine Crankcase Capacity - 6
L / JD 5500, 5400 Engine Crankcase Capacity - 8.5 L).
- Change engine oil every 125 hours if diesel fuel has a sulfur content
greater than 0.7 percent.
Replace Fuel Filter
Replace fuel filter element at least once a year.
- Remove right-hand engine side shield. Close fuel shut-off valve.
- Remove retaining ring and filter. Install new filter with retaining
ring, hand tight.
- Open fuel shut-off valve. Open bleed screw.
- Operate priming pump until fuel flows. Close bleed screw.
Check Hoses and Hose Clamps for Tightness. Check the following systems
hose clamps for tightness: Air Cleaner to engine intake or turbocharger,
Cooling,
Hydraulics, Fuel. Check all hoses for cracks which could cause leaks or
possible failure. Replace as necessary.
Clean Engine Crankcase Vent Tube - Remove crankcase vent tube from
engine. Wash in solvent or blow clean with compressed air. Reassemble
vent tube
breather cap to engine. Be sure vent tube is not kinked or pinched.
Check Engine Idle Speeds - Slow idle speed is 750 to 800 rpm on 5300,
5400 John Deere tractors and 800 to 850 rpm on JD 5500 tractors. With no
load, fast idle
speed should be a maximum of 2590 - 2620 rpm on all tractors.
Change Coolant
- Attach a hose to the drain fitting prior to opening the drain fitting
and collect the coolant and flush fluid in a container for proper
disposal.
- Open drain fitting and drain the coolant.
- Removing radiator cap after the expansion tank has become empty will
speed the draining of the system.
- Remove drain plug from engine block. Flush cooling system.
- Close the drain fitting, reinstall the drain plug and remove drain
hose. Fill the cooling system with specified coolant at radiator filler
neck.
Cleaning Grille Screens, Radiator and Oil Cooler
- Whenever trash builds up on front grille screens or side panels, stop
engine and brush clean.
- Remove side panels, and see if trash has built up on radiator. If so,
remove it using a brush or compressed air.
- If a more thorough cleaning is necessary, clean radiator from behind
with compressed air or water. Straighten any bent fins.
Flush Cooling System and Replace Thermostat
For efficient operation, drain old coolant, flush the entire system,
replace thermostat, and fill with clean antifreeze solution at least
once every 2 years.
- Drain coolant - Remove radiator cap. Open drain valve on radiator and
drain coolant from radiator. Open drain plug on left side of engine
block and drain coolant.
Thermostat must be removed to insure a thorough flush.
- Remove thermostat - Remove thermostat cover, remove thermostat, and
re-install cover (without thermostat). Tighten cap screws to 47 Nm (35
lb-ft).
- Flush system with water - Close all drain valves/plugs and fill system
with clean water. Run engine about 10 minutes to stir up possible rust
or sediment. Stop
engine and drain water from system before rust and sediment settle.
- Flush system with Radiator Cleaner - Close all drain valve/plugs and
fill the cooling system with a good commercial radiator cleaner and
water. Follow instructions
provided with cleaner. Run engine until it reaches operating
temperature. Stop engine and immediately drain system.
- Flush system with water - Close all drain valves/plugs and fill with
clean water to flush the system. Run the engine about 10 minutes, then
drain out flushing water.
- Replace thermostat - Remove thermostat cover and clean off the gasket
material. Apply gasket sealant to new gasket and install along with new
thermostat.
Tighten cap screws to 47 Nm (35 lb-ft).
- Fill with fresh coolant - Close all drain valves/plugs and fill with
specified coolant.
- Re-check coolant level - Fill radiator to the top of the filler neck
and fill the recovery tank to the "LOW" mark. Run the engine until
operating temperature is
reached. Let the engine cool (preferably overnight) and recheck the
coolant level. Coolant level with a cold engine should be at the "LOW"
mark. An engine at
operating temperature should have a coolant level at the "FULL" mark.
When refilling the cooling system it may require several
operating/cooling periods to stabilize
the coolant level in the system. Add make-up coolant to the recovery
tank as needed to bring the coolant level to the correct mark.
John Deere 5300, 5400, 5500 Shifting Transmission
Range, Gear and High/Low Shifts
- Depress clutch pedal and stop tractor before shifting the range shift
lever, direction shift (forward/reverse) lever and, if equipped, the
high-low shift lever.
- Depress clutch pedal before shifting the gear shift lever. Gear shifts
(1, 2, 3, 4) can be made on-the-go.
- Release clutch pedal gradually to take up load smoothly.
Forward/Reverse Shifts
The shift lever has three positions: forward, neutral and reverse.
With clutch pedal depressed, push lever forward from neutral to select
forward travel or pull back from neutral to select reverse travel.
Operating Transmission Control Levers
The transmission gear shift lever operates in an H-pattern.
- Center position is neutral.
- Move the lever to the left and forward from neutral to select the
first gear.
- Move the lever to the left and rearward from neutral to select the
second gear.
- Move the lever to the right and forward from neutral to select the
third gear.
- Move the lever to the right and rearward from neutral to select the
fourth gear.
12+12 Speed Transmission (all models) - The transmission range lever has
three positions: Forward is low range. Rearward is high range. To the
right and forward
is creeper.
24+24 Speed Transmission (40 km/h; 25 mph version of JD 5300, 5400
tractors) - The high-low transmission lever (C) provides a two-speed
additional range
(optional): Forward is low range. Rearward is high range.
24+24 Speed Transmission (40 km/h; 25 mph version of 5500 John Deere
tractors) - The high-low transmission lever (C) provides a two-speed
additional range
(optional): Forward is high range. Rearward is low range.
Selecting a Gear
To extend drive train life and avoid excessive soil compaction and
rolling resistance, avoid ballasting for CONTINUOUS full power
operations in gears slower than
B-2 gear. When using front-wheel drive, ballasting to one gear slower is
appropriate. The tractor may be operated in any gear with engine speeds
between 1600
rpm and 2400 rated engine rpm. Within these limits the engine can be put
under full load. For light load operation, use a higher gear and lower
engine speed. This
saves fuel and reduces wear.
Using Brakes
- Use individual brakes to assist in making sharp turns. Disengage brake
pedal bar and depress only one brake pedal.
- To stop tractor, depress both brake pedals.
- To prevent unnecessary wear, never "ride" the brakes by resting a foot
on the pedals.
- Reduce speed if towed load weighs more than the tractor and is not
equipped with brakes.
- Avoid hard braking applications. Consult implement operator's manual
for recommended transport speeds.
- Use additional caution when transporting towed loads under adverse
conditions, when turning or stopping on inclines.
Using Differential Lock
- When one wheel starts to lose traction, engage differential lock by
depressing pedal.
- Unequal traction will keep the lock engaged. When traction equalizes,
lock will disengage itself by spring action.
- If lock does not disengage, depress one brake pedal and then the
other.
- If tires repeatedly slip, then get traction, then slip again, hold
pedal in the engaged position.
Operating Front-Wheel Drive
Use front-wheel drive as required for better traction.
- Press the front-wheel drive switch in position to engage and in
position to disengage front-wheel drive.
- An internal indicator light will glow when front wheel drive is
engaged.
- When the brakes are applied, front-wheel drive cuts in automatically
regardless of the position selected at the front-wheel drive switch.
- In this case the indicator light does not come on.
Hydraulic Trailer Brakes
- Remove cap from trailer brake coupler and connect pressure hose,
making sure connections are absolutely clean.
- Press down on brake pedals to operate hydraulic trailer brake. The
braking effect depends on pressure applied to the brake pedals.
- To prevent undue wear on the brakes, observe the following points:
- Make sure that the pressure hose is connected. When driving downhill,
select the same gear you would for driving uphill.
- Check the hydraulic trailer brake regularly to make sure that it is
functioning correctly.
Front and Rear Wheel Treads for Trelleborg Tires
Trelleborg tires must only be used with special rims and installed only
in the positions shown opposite (front wheels; rear wheels).
The following tread widths result from the rim positions shown:
550/45-22.5 404TL front tires 1500 mm (59 in.) / 23.1-26 409TL rear
tires 1524 mm (60 in.).
Adjusting Front Wheel Tread (Modelrs with Two-Wheel Drive)
On John Deere 5300, 5400, 5500 tractors without front wheel drive with
front tire size 7.50-16 the front wheel tread width can be adjusted
from:
- 1435 mm (56.5 in.) to 1935 mm (76.2 in.), dish in.
- 1435 mm (56.5 in.) to 1935 mm (76.2 in.), dish in.
- 1568 mm (61.7 in.) to 2068 mm (81.4 in.), dish out.
Adjust Front Axle Tread Width (Tractors with Two-Wheel Drive)
- Jack up front end of tractor.
- When making large tread adjustments it may be necessary to change the
tie rod length before or during axle adjustments.
- Remove four bolts and tapered pins from front axle (2 on each side).
- Slide axle knees to desired position. Both sides should be adjusted to
same spacing.
- Pins and bolts may have to be moved to the companion holes (D) in some
settings.
- Reinstall axle bolts and pins on each side. Tighten bolts to 480 Nm
(350 lb-ft). Set toe-in.
Check Toe-In (Models with Two-Wheel Drive)
- Steer front wheels straight ahead.
- Measure distance between tires at hub level in front of axle. Mark the
point at which you measured.
- Move tractor back about 1 m (3 ft) so mark is at hub level behind the
axle. Again measure distance between tires at the marked points.
- Measurement at front of tires should be 3 to 6 mm (1/8 to 1/4 in.)
less than measurement at rear of tires.
Adjust Toe-In-2 Wheel Drive
- Loosen lock nuts and back out the bolts on tie rod tubes several
turns.
- Adjust tie rods on both sides of the tractor equally by rotating the
inner tube to lengthen or shorten tie rod. Adjust toe-in to 3 to 6 mm
(1/8 to 1/4 in.)
- Tie Rod Rotation / Approximate Change in Toe-in - 1/2 turn / 8 mm
(5/16 in.). 1 turn / 16 mm (5/8 in.).
- Tighten bolts to 85 Nm (62 lb-ft). Do not over tighten as damage to
the tube may occur.
- Tighten the lock nuts to 90 Nm (66 lb-ft).
Check Toe-In-MFWD
- Disengage MFWD and park John Deere 5300, 5400, 5500 tractor on smooth,
level surface. Steer front wheels straight ahead. Stop engine.
- Measure distance between centerline of tires at hub level in front of
axle, using an outside bar of each tire.
- Move tractor back about 1 m (3 ft) so mark is at hub level behind the
axle. Again measure distance between tires at same point on tire.
- Determine the difference between front and rear measurements.
- If the front measurement is smaller, toe is "in". If the rear is
smaller, toe is "out". Toe-in should be less than 3 mm (1/8 in.).
Set MFWD Steering Stops Turning Radius
- Raise and support the front of the tractor so the MFWD axle can be
oscillated to its stops.
- Slowly turn the steering wheel to the left until the steering cylinder
travel has reached its limit, the steering stops, or the tires are
within 25 mm (1 in.) of the grill
screen or the side panels.
- Raise the left side of the axle against its stop and measure the
clearance between the tire and the nearest tractor component. The
distance should not be less
than 25 mm (1 in.).
- Loosen the locking nut on the steering stop and adjust the steering
stop bolt so it touches the steering stop. It may be necessary to
shorten the stop bolt in order to
obtain the maximum turning angle.
- Tighten steering stop bolt retaining lock nut to 125 Nm (92 lb-ft).
Turn wheel fully to the left. Impact knuckle housing to steering stop
five times.
- Repeat above steps for the right side. Retighten steering stop bolt
retaining nuts to 125 Nm (92 lb-ft).
Replace Transmission-/Hydraulic Filter
- Remove filter. Apply a film of oil to new gasket and install new
filter. Hand tighten plus 1/2 turn.
- Run engine several seconds and recheck transmission-hydraulic oil
level.
- Add transmission fluid if required.
Check Neutral Start System
- John Deere 5300, 5400, 5500 tractor is equipped with a starting
system, that prevents inadvertent movement of the machine or the PTO
when the engine is
started.
- Turning the main switch should crank the engine only if
forward/neutral/reverse lever is in neutral position and if PTO clutch
lever is not in engaged position.
- Turn the main switch to start position with forward/neutral/reverse
lever in gear (not in neutral) position. Engine must not start.
- Turn the main switch to start position with PTO clutch lever in
engaged position. Engine must not start.
Check Clutch Pedal Free Travel
- Measure free travel at top of pedal stroke. Adjust linkage to obtain
10 to 16 mm (0.4 to 0.6 in.) free travel.
- To adjust linkage, loosen lock nut, unlatch the connecting clip pin
and remove.
- Rotate clevis. After making adjustment, replace clip and recheck
travel. - When travel is correct, tighten lock nut.
Change Transmission-/Hydraulic Oil Suction Strainer
- Drain transmission-/hydraulic oil.
- Remove the four hose clamps and hoses.
- Replace strainer with a new one, Making sure that the arrow on the
strainer body points forward.
- Re-install hoses and clamps. Fill transmission/hydraulic systems with
specified oil.
Change Oil in MFWD Axle Housing
- 5300, 5400, 5500 John Deere Tractor should be positioned on level
ground to assure correct oil levels when refilling.
- Remove drain plugs from differential housing and wheel spindle (two
plugs).
- When draining the wheel housings, rotate the wheels so the drain is
located on the bottom.
- Drain oil, then reinstall plugs, and rotate the wheels so the "oil
level" mark is level with the ground.
- Recheck oil level after 30 minutes. Add oil as needed.
- Refill differential housing and wheel housings with specified oil.
Fill hub to level mark on wheel hub housing.
- Capacities: differential housing - 5 L (5.3 qt) / each wheel housing -
0.6 L (0.6 qt).
Change Transmission-Hydraulic Oil and Filter
- Remove drain plug from transmission case (A) and drain out oil. On
tractors equipped with MFWD, also remove drain plug (B) in axle housing.
- Lower rockshaft to remove trapped oil.
- Remove filter (C). Apply a film of oil to new filter gasket and
install new filter. Hand tighten only.
- Fill transmission/hydraulic system with specified oil as described in
"Check Transmission/Hydraulic System Oil Level".
Two-wheel drive tractors (Capacity) - 36 L (9.5 U.S. gal)
Four-wheel drive tractors; 30 km/h (18 mph) version (Capacity) - 38 L
(10 U.S. gal)
Four-wheel drive tractors; 40 km/h (25 mph) version (Capacity) - 43 L
(11.4 U.S. gal)
________________________________________________________________________________
________________________________________________________________________________________
 JD SPECS
 JD LOADERS
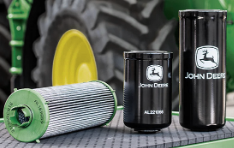 JD MAINTENANCE
 JD INSTRUCTIONS
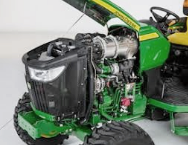 JD PROBLEMS
________________________________________________________________________________________
 JD 2025R
 JD 3039R
 JD 4044R
 JD 4105
 JD 4720
________________________________________________________________________________________
 420 Loader
 419 Loader
 510 Loader
 512 Loader
 520 Loader
________________________________________________________________________________________
 520M Loader
 540M NSL
 540 Loader
 440R Loader
 H180 Loader
________________________________________________________________________________________
________________________________________________________________________________________
 JD 5045E
 JD 5085E
 JD 5100M
 JD 6105R
 JD 6120M
________________________________________________________________________________________
 JD 6155M
 JD 6195R
 JD 6210R
 JD 7210R
 JD 7250R
________________________________________________________________________________________
 JD 7310R
 JD 8245R
 JD 8295R
 JD 8370R
 JD 9370R
________________________________________________________________________________________
 120R Loader
 D120 Loader
 H120 Loader
 45 Loader
 200CX Loader
________________________________________________________________________________________
 D160 Loader
 D170 Loader
 H160 Loader
 H165 Loader
 H240 Loader
________________________________________________________________________________________
 210 Loader
 220R Loader
 300E Loader
 300X Loader
 300CX Loader
________________________________________________________________________________________
 JD 9420R
 JD 9510R
 JD GX335
 JD GX85
 JD LA105
________________________________________________________________________________________
 JD 5065M
 JD 5055D
 JD 5115R
 JD 5105M
 JD 6110R
________________________________________________________________________________________
 JD 6130D
 JD 6225
 JD 7530
 JD 4044M
 JD 7185J
________________________________________________________________________________________
 300 Loader
 300R Loader
 320R Loader
 400E Loader
 410 Loader
________________________________________________________________________________________
 430 Loader
 460 Loader
 521 Loader
 531 Loader
 541 Loader
________________________________________________________________________________________
 551 Loader
 631 Loader
 651 Loader
 661 Loader
 603R Loader
________________________________________________________________________________________
 JD D130
 JD D160
 JD 325
 JD 335
 JD 345
________________________________________________________________________________________
 JD 2520
 JD 3005
 JD 3720
 JD 1025R
 JD 3033R
________________________________________________________________________________________
 JD 5090EL
 JD 5100MH
 JD 5075GV
 JD 6090RC
 JD 6110B
________________________________________________________________________________________
 623R Loader
 643R Loader
 731 Loader
 746 Loader
 751 Loader
________________________________________________________________________________________
 533 Loader
 583 Loader
 633 Loader
 653 Loader
 683 Loader
________________________________________________________________________________________
 H260 Loader
 663R Loader
 663 Loader
 683R Loader
 753 Loader
________________________________________________________________________________________
 JD 6125J
 JD 6150RH
 JD 6210J
 JD 7195J
 JD 8310
________________________________________________________________________________________
 JD 6325
 JD 5525
 JD 5083EN
 JD 5100GN
 JD 5125R
________________________________________________________________________________________
 210C Backhoe
 300D Backhoe
 310G Backhoe
 410G Backhoe
 710G Backhoe
________________________________________________________________________________________
 80 Loader
 100 Loader
 146 Loader
 148 Loader
 158 Loader
________________________________________________________________________________________
 168 Loader
 175 Loader
 522 Loader
 542 Loader
 540R Loader
________________________________________________________________________________________
 562 Loader
 563 Loader
 673 Loader
 741 Loader
________________________________________________________________________________________
 L108 Automatic
 L120 Automatic
 LA110 Automatic
 LA120 Automatic
 LA150 Automatic
________________________________________________________________________________________
 LT155
LT155 LT160 Automatic
 LT180 Automatic
 LTR180
 X165
X165________________________________________________________________________________________
 E100
E100 E120
E120 E150
E150 LTR166
________________________________________________________________________________________
 LA135
LA135 LA165
LA165 LX277
LX277 LX288
LX288 LX255
LX255________________________________________________________________________________________
 S240
S240 GT235
GT235 G110 Automatic
 JD 3203
 JD 5520
________________________________________________________________________________________
 JD 316
 JD 420
 JD 425
 JD 445
________________________________________________________________________________________
 JD_5050D
 X300
X300 X304
X304 X310
X310 X110 Automatic
________________________________________________________________________________________
 H310 Loader
 H340 Loader
 H360 Loader
 H380 Loader
 H480 Loader
________________________________________________________________________________________
 240 Loader
 245 Loader
 260 Loader
 265 Loader
 280 Loader
________________________________________________________________________________________
 600R Loader
 620R Loader
 640R Loader
 660R Loader
 680R Loader
________________________________________________________________________________________
 JD_5039D
 X146R
X146R X360
X360 X155R
X155R X140 Automatic
________________________________________________________________________________________
 X350
X350 X380
X380 X500
X500 X590
X590 X700
X700________________________________________________________________________________________
 3036E
3036E 2038R
2038R 3038R
3038R 4049M
4049M JD 4100
________________________________________________________________________________________
 X738
X738 X740
X740 X748
X748 X749
X749 X950R
X950R________________________________________________________________________________________
 JD 4510
 5045D
5045D 5050E
5050E 5060E
5060E 5078E
5078E